Image Map

Saturday, June 27, 2009

Need some opinions!

Hey followers! I need your opinions on this choker that I'm designing! I've actually made it, but I'm too lazy to take pics right now. So instead, I'm going to show you my Photoshop prototypes!

A few things before you start commenting away:

1. The "original" prototype pic was too long so it now has only 4 of those filigree connectors. (2 on each side)
2. Right now, there are sets of 3 chains on either end connecting the box clasp (round thing on the end)
3. The size of the crystal in the 2nd pic is more scaled to size than the 1st pic. Yeah... it's huge.

1st prototype:


See? No smaller crystals hanging. And longer.

2nd prototype:


I added the crystals in the 2nd pic because I think it needs a little more "oomph." I was thinking about stringing some chains to add more but I'm scared it will be too much. Maybe I'll get some pics up of the real thing so you guys will have a better idea.

I rather NOT get a smaller crystal seeing as how I've already spent almost $50 on this choker. I like BIG AND SHINY things. Damnit.

****EDIT****

I finally got off my lazy butt and took pics! Here they are:

(Click to enlarge)

It's 14 inches long and shiiiiiiny. See? I wasn't kidding about the giant crystal. It's actually comfy to wear too. I hand bent all the filigree piece slightly so it would fit against my neck. Right now, I'm just trying to compare prices online for the smaller crystals and bead caps and such. I'm buying a new bail to connect the crystal to the main filigree piece... I hope it works out. The crystal headpin I'm using now is not stable enough.

Monday, June 15, 2009

ALERT! Another giveaway!

Hey fellow followers! I'm here to alert you to another giveaway! This time it's at The Fabric Shopper! They're giving away some really cute Hippie Chicks fabric by Marcus Fabrics. They're so bright and psychedelic! :D

Go enter now! I command you!

Sunday, June 7, 2009

I think I plan too early...

I received my prize from Beth and I must say that the white roses and pearls necklace is so much more stunning in person! I need to get a photo of me wearing it but I don't have a pretty enough outfit to wear it with at the moment. :)

So... I believe I plan for certain events a little too early sometimes. This one would be my wedding. (I'm not even engaged yet but I will be soon..... lol) I've already started looking up fabrics and trims and appliques to make my dress from. Just today alone, I bought components to make my choker with. I had been planning the design for months and I took time today to compile all the images of the parts and Photoshopped them together to see how it looked. I tried my best to scale all the parts to size so they would (hopefully) look like the real thing. Anywho, here's the image I made:


(Click to enlarge... although it doesn't get that much bigger. Not on my screen resolution, anyway)


Pretty, no? I forgot to add the box clasp but here's a link to it: Beadaholique

It's made of brass filigree and gold plated components inset with Swarovski crystal. It took me forever to find a bail I liked to hang the baroque crystal, but finally I decided to buy Swarovski head pins and make my own bail. I'm very happy about all of it and I hope it turns out as good as the picture. I spent a total of $45 on all of it which I think is great because a choker like this would probably sell around the upper $100s.

Here are the places I bought my supplies from:

Accent Factory
Beadaholique
Fusionbeads

I can't wait for all of it to come in!!! :D

Monday, June 1, 2009

*GASP*

Holy crap! I won more giveaways! :O I'm sooo happy! EEEeeeeee!

I got some BISCOTTI (OMG YUM) and knitting patterns from Beth, a beautiful white roses and pearls necklace from Paula, and lace and trims, baby booties, bag, and Japanese fat quarter fabric from Ahfat.

Wow! That's a lot of stuff! I have stuff coming from Utah, Wisconsin, and SINGAPORE! I'm especially excited about a package from Singapore since that's where my family and parents immigrated from. It's my motherland! :) (Sadly, I've never been there.)

****EDIT****

I got another giveaway prize! This time, it's a free re-useable shopping bag from Green Bag Lady! I'm so excited! I've been meaning to go more green by using re-useable shopping bags because I hate hate HATE those plastic bags all over my house! I just need to remember to stuff all my tote bags in my purse before I go anywhere so I can use them at stores.

Sunday, May 31, 2009

Hooray!

So May 27th - May 31st was Sew Mama Sew's May Giveaway day! There were over 400 blogs that participated in giving away random crafted goods and/or supplies. I swear I entered over 100 blogs for the giveaway and I actually won something!

I entered Sew Little Fabric's giveaway for an embroidery pattern of this owl wallhanging and got it! Yay! It's my first time ever to win a giveaway! I'm a novice at embroidery, but I really want to put this on a bag or shirt. Maybe I'll try out the embroider on an actual wallhanging first so I can put it up in my dorm room next year. (The room theme is owls and apples :D )

I hope I win more! (Although I highly doubt it.)

I just finished my haori and juban. For those that don't know what those are, a haori is similar to a kimono except it's used as a jacket with slits at the underarms. The juban (usually white) is worn underneath the haori. The juban was originally worn as an undergarmet to keep from dirtying the haori which reduced the need to wash the haori since workers in Japan from the olden times didn't have much clothes to wear from day to day like we do now. I'm too lazy to take a pic of me wearing them right now... but the haori is black and the juban is white.

It's actually a cosplay outfit from the anime Bleach. Yeah. I'm nerdy.

Tuesday, April 1, 2008

Owl pattern & Tutorial

Hey! I'm actually posting a pattern and a tutorial!


This is the pattern for the 003 Owl plush I made for my friend. Please do not reproduce and use for profit purposes. This pattern solely for those that want to make this owl for gifting or personal purposes.


Click on the image for the full printable size or right click and choose "Save link as..."!

Now for the short tutorial!

1. Cut out the recommended number of pieces.

2. Sew the wings first! Put the right (or outsides) of the fabric together and sew around the edges EXCEPT the straight edge (this is where you stuff in the stuffing... if you want to stuff it).

3. Flip the wings inside out so that the right side is now on the outside.

4. Sew up the notches/darts (the V-shaped cutouts) on the body pieces. This will give the body some dimension so it's not all flat.

5. Now whipstitch (or stitching of choice) the belly and face pieces onto the front body piece. You can also sew/insert your eyes at this time too.

6. Put the right sides of the body pieces facing each other and pin the wings and feet.
IMPORTANT! With the right sides of the body pieces facing each other, sandwich the wing (and feet) pieces with the opposite tips facing each other in between the body pieces and pin the wings and edges together. Also, pin the feet pieces facing inward.

Like so: 

7. Sew! Sew like the wiiiiind!!!! Remember to leave an opening for stuffing!!!!
8. After you're done sewing, carefully flip it inside out and you can start stuffing!
9. Sew up the opening and voila! You have a cute pygmy owl!

Yay!

Sorry for the crappy tutorial.... if you have any questions or concerns please leave a comment!

Monday, March 31, 2008

Nessie the Loch Ness Monster and more gifts...

So after Asky the Fuzzy Blue Squidopus and Downy the Orange Fuzzy Downs-Syndrome Sperm Whale comes...

Nessie the Lime Green Loch Ness Monster. She's a girl.

This is probably my favorite plush ever!! I drafted my own pattern! :D I love sewing with polyester fleece... it's stretchy and doesn't fray. The spots on her back are made of a navy blue t-shirt my dad never wore.

It seems that all the fabric I buy is never used for what it's originally intended for... I bought this lime green fleece to make an Invader Zim Gir plush for my friend, but that never happened... so it became the Loch Ness monster after my boyfriend kept talking about how the Loch Ness monster is his favorite mythical creature and how cool it would be if I made him a plush.

Pictures!!!


Comparison size! My boyfriend is 6'2"... Yeah. Nessie's a big girl. :D

NOW FOR THE OTHER STUFF!

So... I actually had a craft swap with a friend of mine... she made me a Harry Potter Hufflepuff scarf (since I'm a Hufflepuff and all) and I was to make her an owl plush named 003 from the anime Yami no Matsuei.

I used a butt-ton of references and drew up the pattern myself. :D You can see the pen marks on his eyebrows... ignore that. I used tan and brown wool felt from Hobby Lobby and the eyes were from Hobby Lobby as well.


^One of the reference pics I used. I swear 003 looked different in every ref pic I found. :P

My suitemates, roommate, and I thoroughly enjoy shopping at thrift and consignment stores... so my roommate found a cute shirt for $.99 but couldn't fit it so I made it into a pillow for her.


The backside is some powder blue cotton jersey that I cut from a twin jersey sheet I found at Salvation Army.


And FINALLY! The end of this long post! It's the Slytherin scarf I made for my roommate for Christmas! LOL. My roommate is so goofy.


Knitted with Bernat Satin Hunter and Silver that I ordered online on eBay. My 3rd scarf ever! :D

That's all the non-jewelry gifts so far! More jewelry updates later!

Friday, March 14, 2008

Gifts in General

I like to make stuff for people.... which is kinda bad because I never get paid for my stuff. :S

Anywhos, these are most of the gifts I've made for my friends from Christmas 2007 till now.


A hoodie I bought at Wal-Mart and added a stencil and hand-made ying-yang patch. A gift and modeled by my boyfriend. Patch was painted with fabric paint and design was hand done as well.


My first knitted item ever! A Harry Potter Gryffindor scarf for my friend.


My 2nd knitted item ever! A black garter stitch scarf for my friend. Knitted with Red Heart black boucle yarn.


A stenciled shirt that says "Because I'm Prettier" for my friend. T-shirt was store-bought and stencil was made in Photoshop.


Ron Weasley Potter puppet pal for my roommate! Handsewn and made of felt.

Ehh... that's it for now until I get a picture of my roommate's Harry Potter Slytherin scarf...

Friday, March 7, 2008

So I've been busy...

I've been busy with school, but at the beginning of this year I posted most of my jewelry onto Facebook along with prices.

Within a day, I had requests flooding in for jewelry commissions. I was so happy. :D

They've slowed down now, but I still have some commissions that come in about every couple of weeks. Anywho, here's the jewelry I've made so far along with prices.

*NOTE: I'm not limited to just these pieces. I can also make custom jewelry... just don't ask for anything made of metal... I don't have specialize in that and plus it's super expensive and I don't have the tools. (I'm just a college student!)


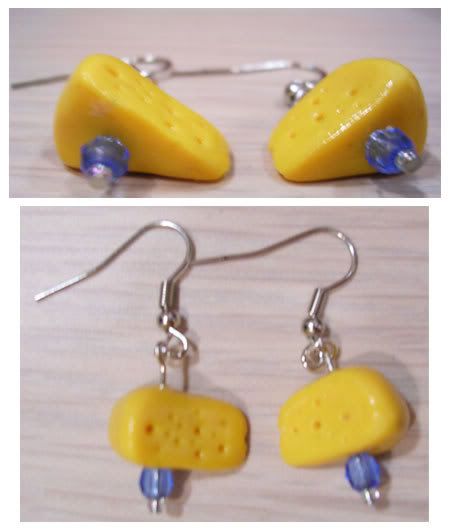
Cheese earrings - $6.00
Medium: yellow Sculpey clay & plastic beads


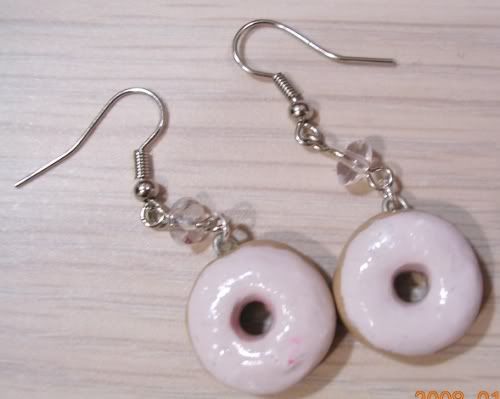
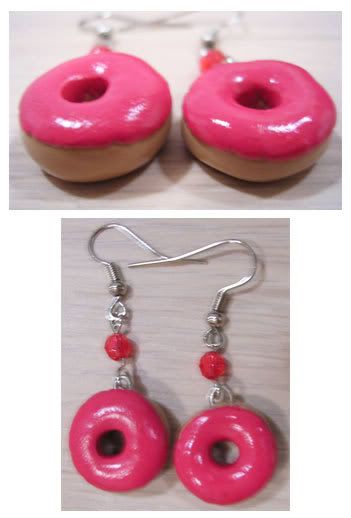
Donut earrings ("icing" color can be customized) - $6.00
Medium: tan Sculpey clay, custom colored & white Sculpey clay, plastic beads


Jelly-filled donut earrings - $8.00
Medium: tan Sculpey clay, custom colored Sculpey clay, white chalk pastel ("powerdered sugar")


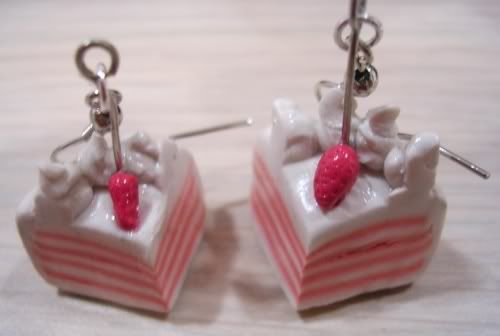
Cake earrings - $8.00
Medium: white & custom colored Sculpey clay


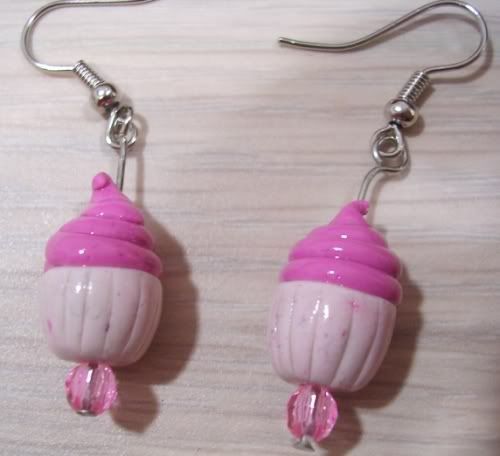
Cupcake earrings - $8.00
Medium: custom colored Sculpey clay & plastic beads


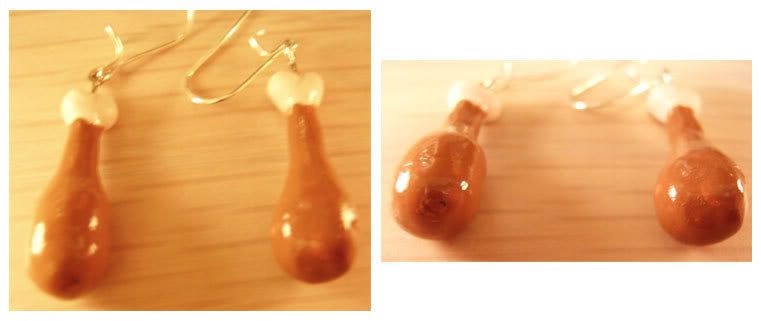
Drumstick earrings - $6.00
Medium: Sculpey clay & acrylic paint


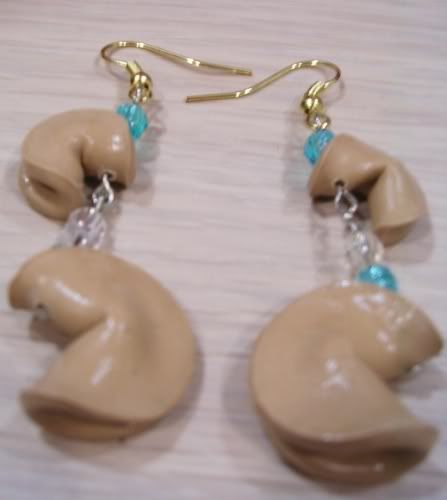
Fortune cookie earrings - $7.00
Medium: tan Sculpey clay & plastic beads


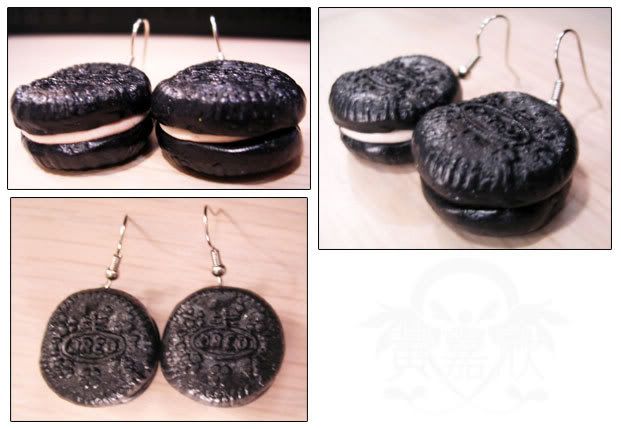
Oreo earrings - $10.00
Medium: black Fimo clay & white Sculpey clay


Panda earrings - $7.00
Medium: black Fimo clay & white Sculpey clay


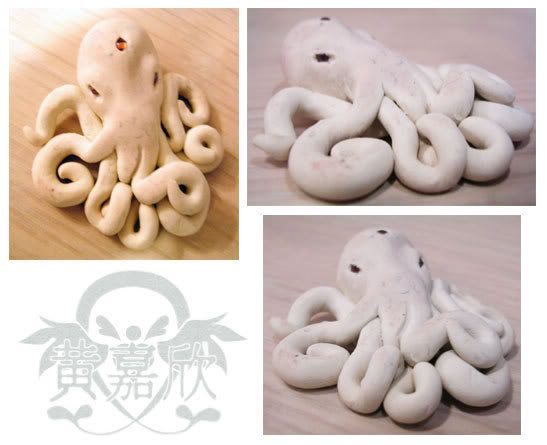
Cutesy octopus earrings - $10.00
Medium: Sculpey clay, acrylic paint & plastic beads


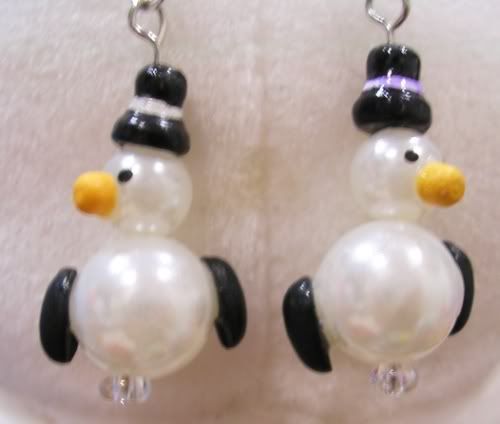
Penguin earrings - $6.00 (for limited time only!)
Medium: mini Christmas ornaments (hat has been repainted)


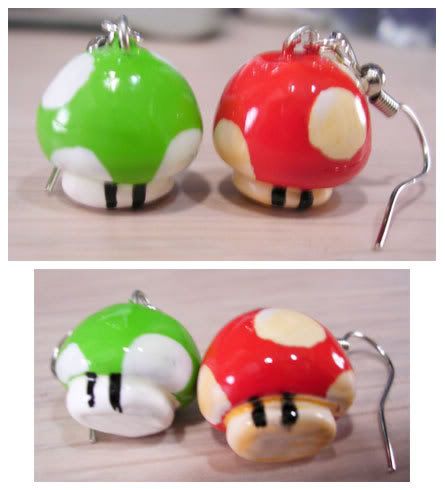
Mario 1-up mushroom earrings - $10.00
Medium: Sculpey clay & acrylic paint


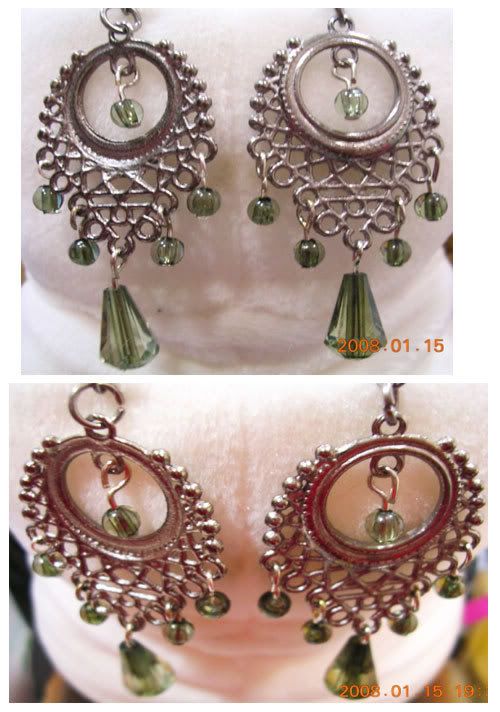
Chandelier earrings - SOLD OUT
Medium: pewter findings & plastic green beads


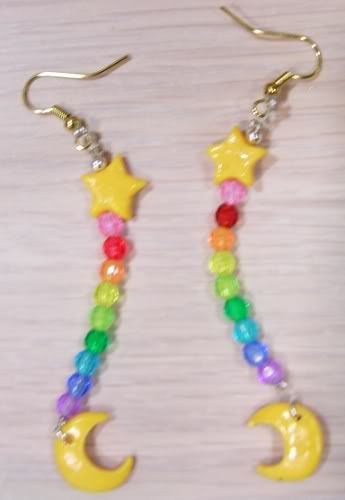
Stars n Moons dangly earrings - custom piece (e-mail me if you would like a pair)
Medium: yellow Sculpey clay & plastic beads


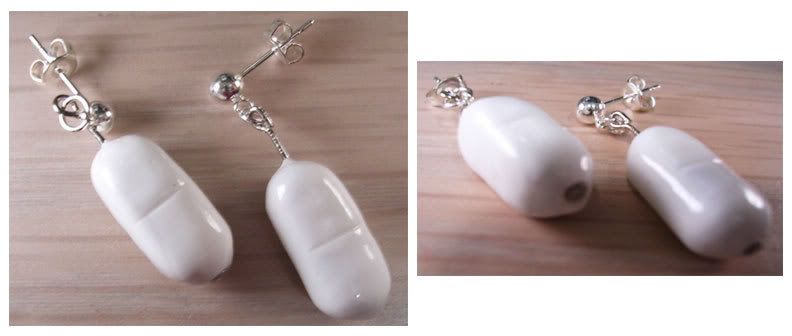
Antibiotic earrings - custom piece (e-mail me if you would like a pair)
Medium: Sculpey clay & acrylic paint


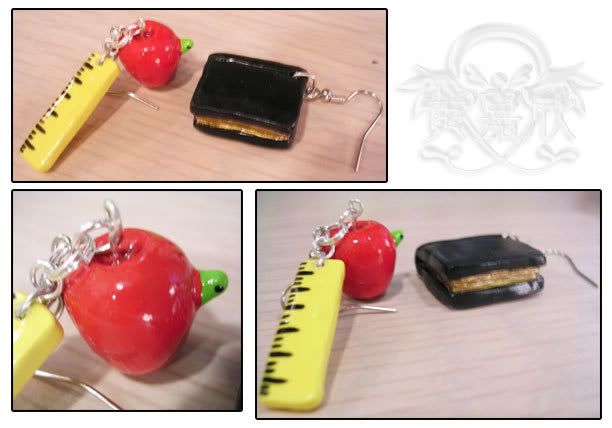
School-themed earrings - custom commissioned piece (e-mail me if you would like a pair)
Medium: Sculpey clay & acrylic paint

<-- Before painting
<-- After painting
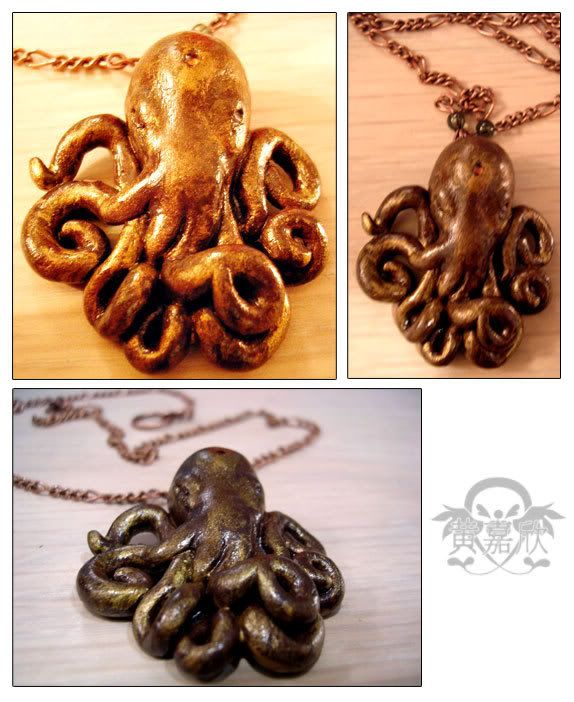
Octopus necklace - custom commissioned piece (e-mail me if you would like it) Medium: Sculpey clay, gold, copper, brown acrylic paint, copper findings, glass seed beads (eyes & forhead ornament), and patience.


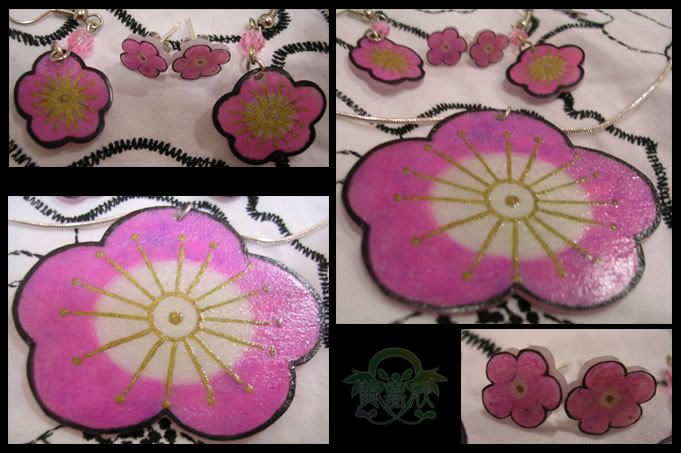
Japanese sakura jewelry set - custom piece for a charity auction (e-mail me if you like me to replicate it)
Medium: shrink film, color pencils, gold acrylic paint


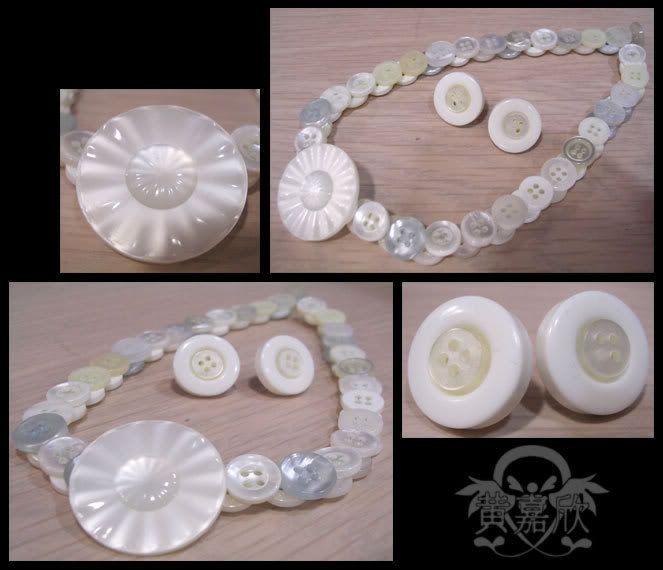
Button choker & earring set - $23.00 (entire set) $5.00 (earrings only) $18.00 (choker only)
Medium: buttons from button stash & fishing line
***Due to the variety of buttons, appearance and style may vary.

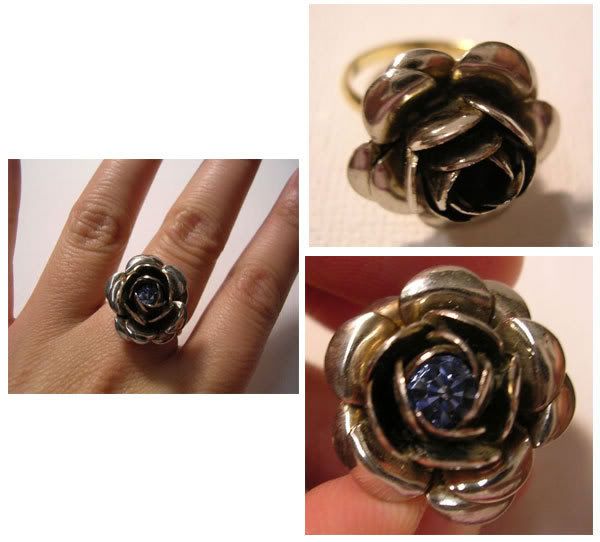
---One-of-a-kind pieces---

These are made from random findings I discover at thrift store or stuff I find randomly in my house... so... they can't be replicated.


Rose ring - made from earring and scrap ring


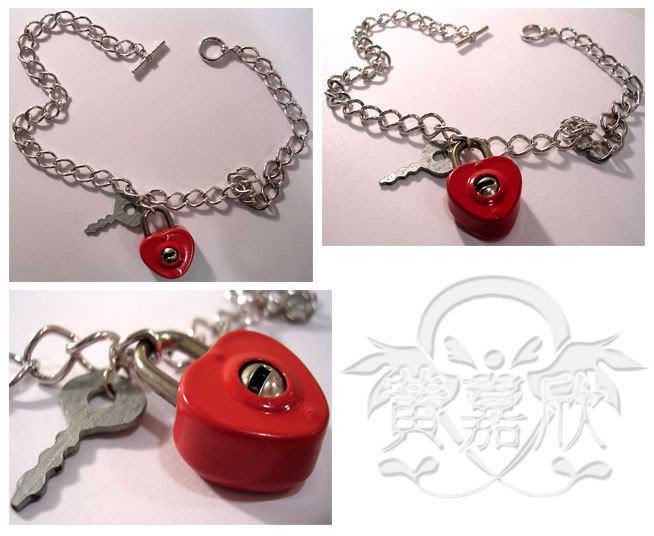
Locked heart Valentine's necklace - made from heart padlock and key


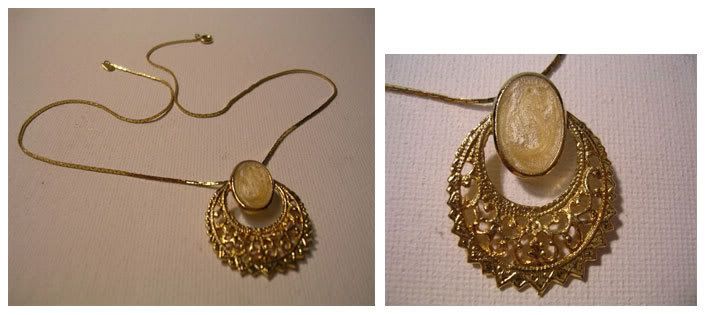
Art nouveau necklace - made from a gaudy earring and random gold chain from my house

That's not all of the jewelry that I'm selling! Here's a link to my Facebook album to see more:

http://www.facebook.com/album.php?aid=2002158&l=d19fd&id=1287000031"

Well, that's all the jewelry I have for now. There will be more soon!