Image Map
Showing posts with label recon. Show all posts

Friday, October 19, 2012

Plus Sized Skirt to Cute Paper Bag Skirt

Things suddenly became a little busier in our house. With the last semester of school coming to an end for my husband, we are suddenly faced with decisions regarding our future. Some of you may know that my husband is a Machinima Youtube commentator. This means that he makes money from sponsors and video views on his video game commentary videos. 

Recently, we sat down and had a long chat. He revealed that he wanted to continue his Youtube career instead of pursuing a job in mechanical engineering. It may seem like a waste of a bachelor's and master's in business degrees, but the income he currently brings in is no small amount of pocket change. Since I've technically been unemployed, we've been living off his income alone for the past 5 months. I'm happy for him too! I'm glad that he's found something that he truly enjoys doing and while making some hard earned money.

Before Brad told me that he was taking on an internet career, I had hoped that we would move wherever he got an engineering job. Now that he'll be working from home, I actually get to choose where we move. 

So, I chose the Dallas-Fort Worth metroplex area in Texas. My big brother's family lives there and the state is faring quite well in this down economy. Jobs are aplenty and the healthcare industry is bustling in the Dallas-Fort Worth area. This means I can expand my horizons in my nursing career. Along with applying for jobs and searching for houses, I've been cleaning and preparing for a visit from my sister, brother-in-law, and nephew this weekend. I'm so excited!

Since I've been too busy to craft new things I decided to post about something I made awhile back... a chambray skirt!


Wednesday, September 12, 2012

DIY Regular Scarf to Circle Scarf

Instant gratification crafts. We all like those. You make them quick and wear/use them quick. I remember seeing a tutorial on transforming a regular pashmina scarf into a circle scarf, but I can't seem to find the link. I was rummaging through my scarves and found one that I did not wear much because I hated the dangl-y ends getting in my way. 

So, I turned it into a circle scarf! In 5 minutes!


Tuesday, September 4, 2012

Winter Shorts (And How To Wear Them)

Ahh... the approach of fall... one of my favorite seasons of the year! Except, it's not coming fast enough. In the South, fall and spring only exist about 3 weeks out of the year. Right now, it's 98°F with a heat index of 105°F with no drop of temperature in sight. Oh don't worry, this isn't a heat wave. This is normal. It's just Mississippi. :P

Most of you probably think it's ridiculous to wear shorts in the winter. Since it rarely drops below 40°F during the winter in the South, I think shorts (with tights or leggings) is a fabulous idea although the trend hasn't really sparked down here. Then again, Mississippi doesn't catch onto trends as quickly as the rest of the nation. :/

Although I get strange looks from strangers wearing shorts in the dead of winter, I don't really care. For one, I don't get cold very easily. Ever since my wool pants to shorts tutorial, I have been looking for wool pants of every color to convert into shorts. This week, I've made a pair of brown, navy, and black leather shorts!

Feast your eyes!


I can't wait to wear these! I was sweating just trying on these outfits! Let me break down on how to wear these babies.

Thursday, August 2, 2012

[TUTORIAL] Wool Pants To Shorts (and how to add belt loops to pants)

I finally got my schedule for my new job today. The good thing is that I get to pick what days I want to work, but the bad thing is that the days available are first come, first serve.

So far, I am only working one day and that was the only one they had available for me closest to where I live. :(

Today's post was inspired by Freshly Given's wool pants to shorts tutorial that I had pinned on Pinterest long long ago. In my recent thrift shopping extravaganza, I picked up a pair of wool, grey-ish XOXO dress pants. They were very cute, but unfortunately had some awful stains all over it. Luckily, they now have a new life as wool shorts!


I used Freshly Given's tutorial as a vague guideline to make mine. I'll be going a little more in-depth on how to measure for the cuffs and even show you how to make belt loops!

Let's begin!

Thursday, July 19, 2012

[TUTORIAL] Dress Pants to Skinny Ankle (Cigarette) Pants

Woah! I've been up FOREVER! Well, since 1pm yesterday, took a small nap, but I've been up since! I even ran this morning at 6am!

So, this post is about what I've done all night. I'm a little slow on fashion trends, but I LOVE those ankle length skinny pants, otherwise known as "cigarette" pants. While I was studying abroad in London in June 2007, these were already in style and I saw them EVERYWHERE in Camden Town. The one thing that's different with these new pants are that they're more sleek and office-approved than the skin tight cigarettes of the UK.

MONTHS ago, I bought 3 pairs of dress slacks at the thrift store: navy, black, and grey. I had the intention of making these into cigarette pants, but I FINALLY got around to trying one this morning. I found Miss Allie Jane's tutorial and was inspired! Don't get me wrong, I love her tutorial, but it didn't seem to go into deep detail so I decided to make my own tutorial covering all the little things.


Saturday, July 14, 2012

DIY Sweetheart Bandeau Top [with link to tutorial]

Strapless tops were never one of my favorite pieces of apparel. I was a bit self conscious about my shoulders and since most of them were tight fitting, it made me dread my lower stomach pooch.

This summer, I've been looking for new pieces to wear and I found this tutorial by fake-leather via Pinterest. It looked pretty simple and I tried it out on a spaghetti strap tank I already owned but never wore.

The verdict?


I LOVE it! I've made 5 of them in different colors! The tops look especially cute with skirts and a big belt so it hides my stomach pooch quite well.

There are a few steps not covered in the tutorial that I'm going to run through.

I started with this coral colored tank:


In fake-leather's tutorial, it doesn't seem like her top had a built-in shelf bra. I really hate shelf bras with a passion and despite looking high and low for a tank that DID NOT have one, all I found were ones WITH shelf bras.


So, I'm going to show you how to cut out that shelf bra and take off the straps! All you need is a pair of sharp scissors, a steady hand, and patience. 

First, find the side seams and pick which ever side to start cutting.


Next, start cutting from the bottom where the elastic is. Cut along the seam and then veer off either left or right. Your preference.


From here, just cut carefully around the upper part near the top elastic all the way around. Be careful and try not to cut the fabric on the back side or you'll have holes show up when you wear it. A good way to prevent is to take it slow and keep your hand under the bra to make sure the scissors are between the shelf bra and tank fabric. 

After you've finished that, you can cut straight across on the front of the tank (see fake-leather's tutorial) but don't cut the back straps yet! I've found if you just cut it off, it's left with these irritating "nubs" that will dig into your backside when you wear it and makes it 100x hard to sew through on your machine or by hand.

So, take your seam ripper or your scissors and carefully find the threads that hold down your straps and snip them ONE AT A TIME. 


Do this for both straps and now you're just left with the strapless tank body to finish! Follow the rest of fake-leather's [tutorial] and you're on your way to a cute sweetheart bandeau top for summer!!!

Here's how mine turned out! (Disregard the dusty mirror and stomach pooch.)


Tuesday, July 10, 2012

[TUTORIAL] Removable Bowtie Shirt & How to Enlarge A Shirt

Hey guys! It's Tutorial-Tuesday! (Not really. I am not motivated enough to post a self-made tutorial every week.) Today, I'm going to show you guys how to ENLARGE a shirt that's too small and how to alter a long-sleeved button-up into a sleeveless bow-tie button-up.

I was inspired by Extra Petite's tutorial on how to transform a button-up to sleeveless bow-tie top except the shirt I had was TOO SMALL for my busty Asian self. I may be petite, but I was unfortunately (hehe not) blessed with my grandmother's Amazonian Asian genes of bustiness.

So, I shall show you the ways of enlarging a shirt!

Thursday, September 27, 2007

Asky the Blue Fuzzy Squidopus [with link to pattern]

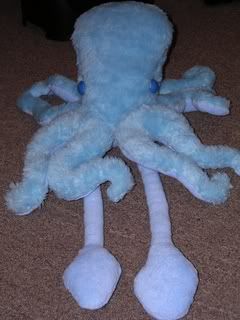
Meet Asky, the blue fuzzy squidopus from the Trans-Atlantic Rift.

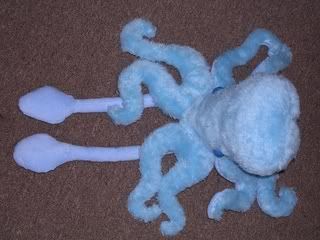
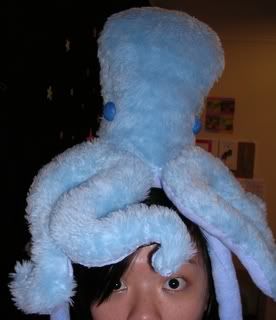
He was born from a simple request from my boyfriend who asked me to make him a blue fuzzy squid for his birthday. So... I went about searching for patterns and found a pattern for a cephalopod on Craftster.org. The most awesome thing about him is that the blue fur was from an ugly vest I found on eBay. I searched everywhere for cheap fake fur, but they were at least $16 a yard. So.... after searching through ebay, I found a blue fuzzy, hooded vest and fought another person to buy it. The long tentacles and the bottom side of Asky are made of light blue stretchy terry cloth taken from an old shirt I had. I tried to embroider light green eyes on him... but it's hard to embroider on fur. So I found 2 blue buttons in my button stash and used them. :)

So yeah... he doesn't really look like a squid except that he has the 2 extra long tentacles that squids tend to have... so he's a squidopus! :D

He is entirely handsewn. Ow.

The pattern can be found here: [link]

PICTURES!

<-- He's coming to get you...

<-- Top view

<-- He likes braaaaaiiiiinnnnnnsssssssssssssssss!

Stuffed creations! [With link to pattern]

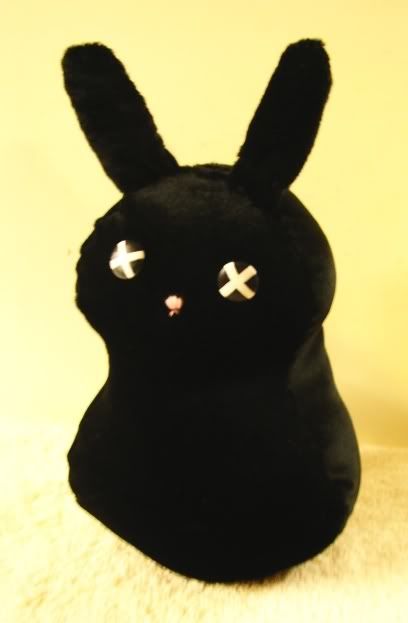
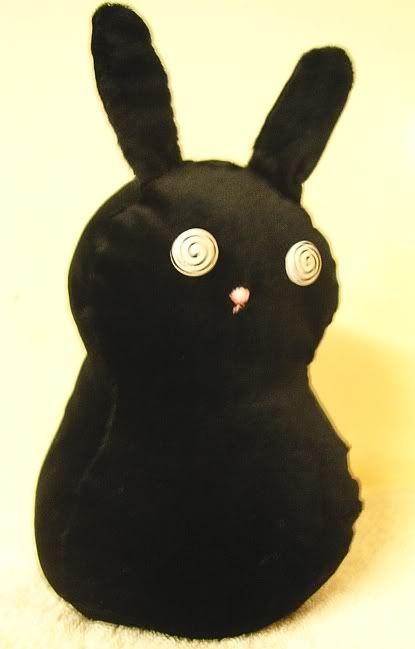
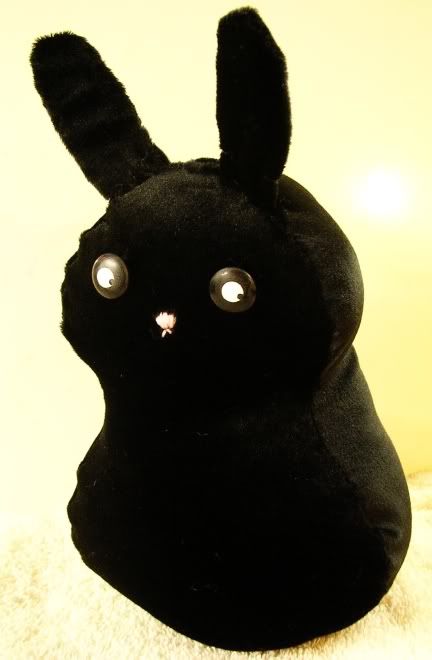
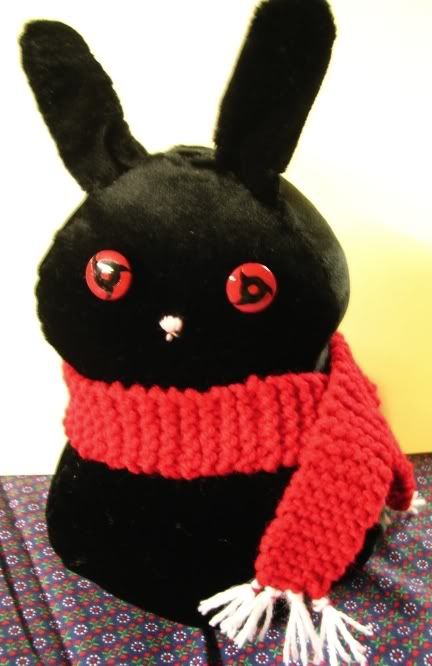
So... one of my good friends has a story where she killed a rabbit when she was 4 with a PVC pipe. She also likes the Akatsuki from the anime, Naruto.... so I decided to mix the two themes together.... and here is the result.

A stuffed black rabbit with interchangeable eyeballs and a removable, hand-knitted scarf.

-- Dead bunny  -- Dizzy/Confused Bunny  -- Derp Bunny -- Naruto Akatsuki Bunny w/ scarf


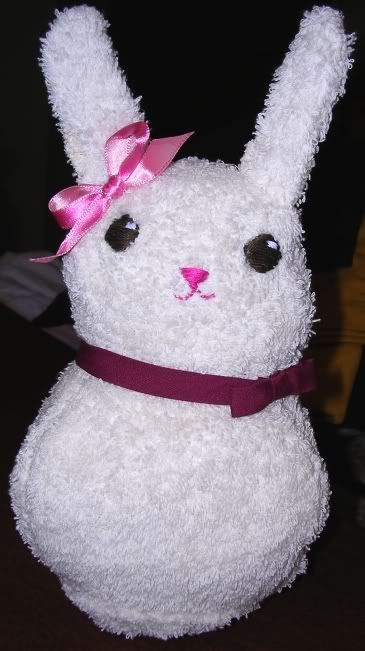
The fabric itself is from an old black velvet skirt I found in my old clothes. There are wire pipecleaners in the ears so they can bend and stay bent. The eyes are buttons with snap fasteners sewn onto them. Each of them were handpainted and sealed so the paint wouldn't chip off. Since my sister took all the knitting needles, I used some old pointy chopsticks to knit the scarf from red acrylic yarn I got from Wal-Mart. It's the first thing I've ever knitted and actually finished! Yay! :D Also, the nose is embroidered... it was my first time. Kinda crappy, I know. Also, I made a "good" bunny for my neice.


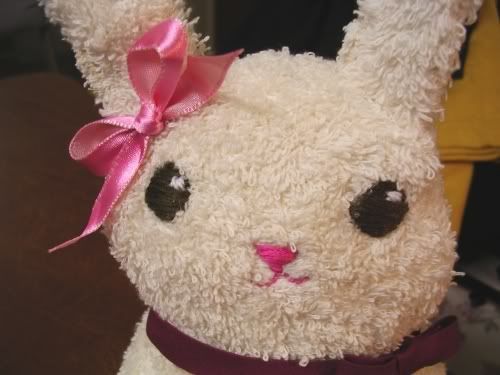
This one was made from a towel I found lying around. I had no idea that terry cloth was so hard to sew with! Clearly, I'll never use this fabric again. Also, my second round on embroidery... I think this attempt turned out a little better. I'm so proud of the bows! :D

***UPDATE***
My sister's cat ate some of the interchangeable eyeballs on the black rabbit before I could mail it to my friend..... but I made a different set! BEHOLD! DISAPPOINTED BUNNY!


I got the pattern for it from here: Wee Wonderfuls

Saturday, May 12, 2007

Clothing Recons

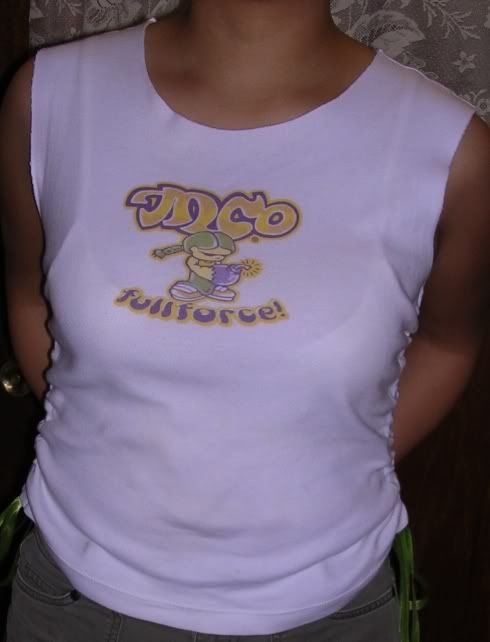
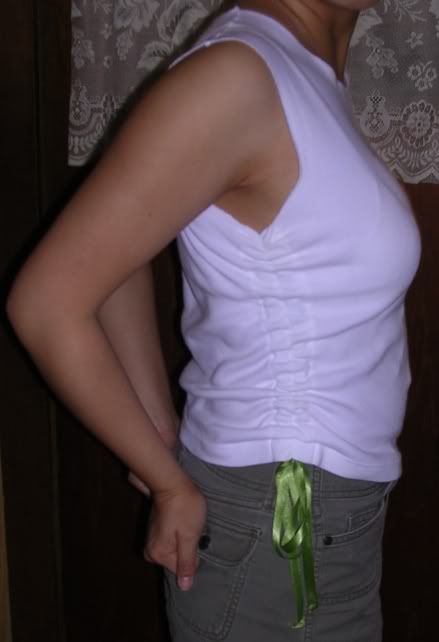
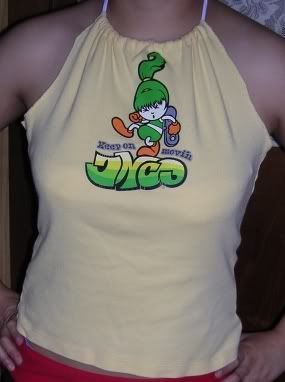
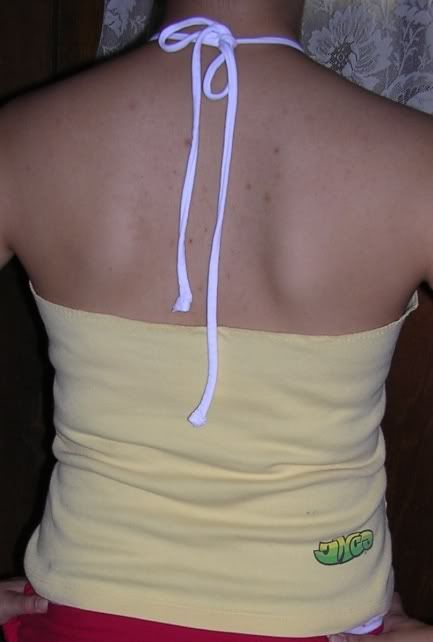
More crafts ahoy! This time I went through my older sister's closet for old t-shirts she doesn't wear anymore. I found 2 cute shirts and decided to make one into a halter and the other into a cute ruched-side tank. Many of these designs were inspired by Generation T: 108 Ways to Transform a T-Shirt.

Here's pics of the white ruched tank:

Front-->
Side view of ruched side-->

Here's pics of the yellow halter:

Front-->
Back-->

The white tie is made from a strip of another white t-shirt I re-coned. Hrrmm... that reminds me... I have to get pics of those too. :P

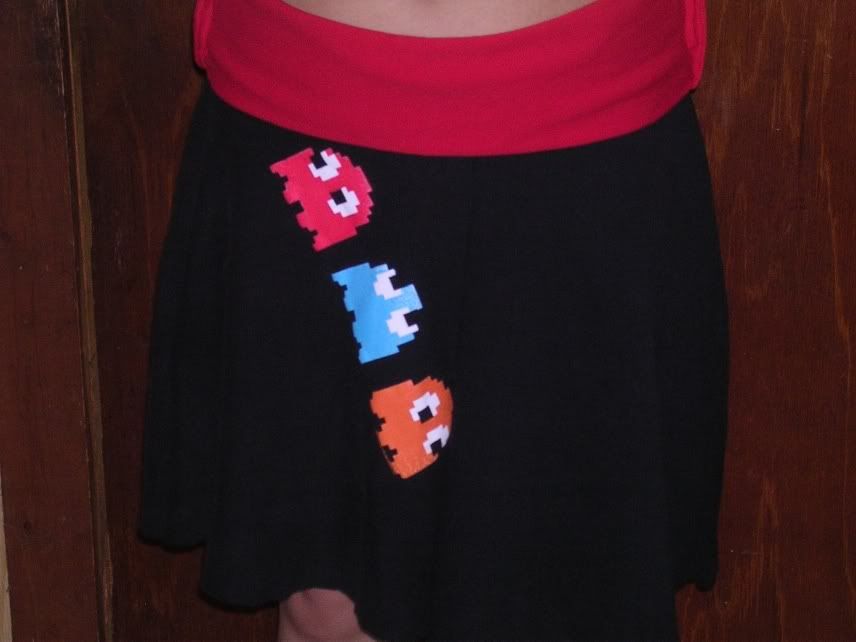
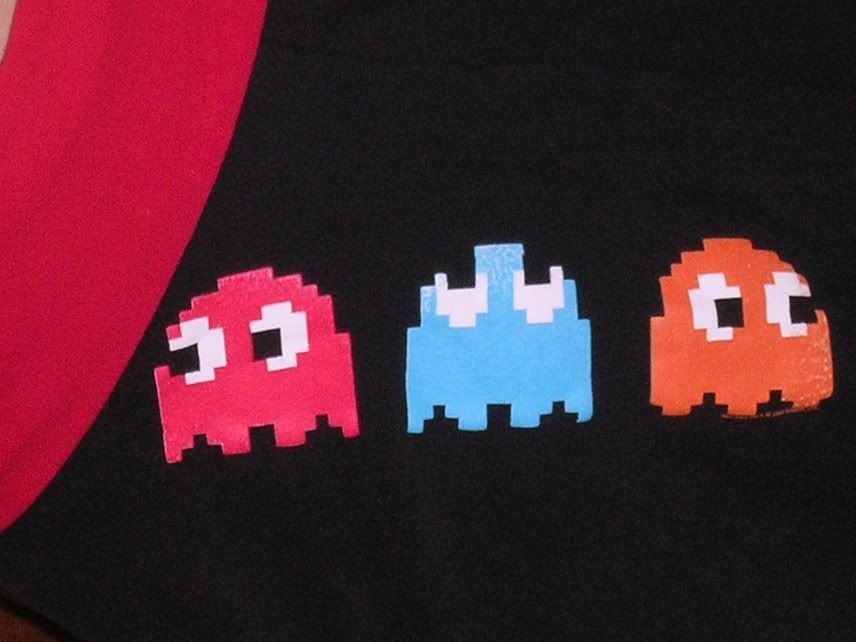
And finally, here's the last recon item of the day! A Pacman skirt made from 5 different t-shirts. It should have only been made from 3 t-shirts, but I was having trouble finding 2 exact sized black tees and plain red tees. I found the black Pacman tee at a Goodwill store, one panel was made from a black tee my friend gave me, and the 4th panel was cut out from a black tobacco promotional shirt my dad had. (He never wore it anyway.) The red band was made from 2 separate red tees. If I had a better pic, you can see that they are 2 different color reds. One tee was from my college tee and the other from an old high school Homecoming tee.

Pics:

Front-->
Close-up on Pacman ghosts-->

Well, that's all the sewing I've done for now. I'm currently working on sock arm warmers and I have to finish my U-shaped butt pillow. I'm hoping I can make a faux Harry Potter Gryffindor scarf tonight, but time is slim and I must pack for my month long trip tonight. ^^;